Pages

Showing posts with label diy. Show all posts

Tuesday, May 7, 2013

Super Easy Gallery Wall Tutorial

We are slowly making our way through the house with new fresh paint.  The latest area we tackled was our hallway.  I thought I would show you how we hung up our photos in a few easy steps. 

The first thing you are going to want to do is grab some ugly wrapping paper that you will probably never use.  Mine happened to be lined, which is even better.

DSC_7160

Lay out your frames how you would like for them to be on the wall.  Then flip them over.

DSC_7159

Take a photo of the frames just in case you forget the correct order.  Then trace each of the frames.  You will need to measure to see where the nail will need to go for each one.  Make sure to mark where the nail hole will need to go on the wrapping paper.

DSC_7162

Once you are finished measure to make sure you know where you want your gallery wall to be.  We measured to make sure it was centered on this wall.  Then tape it to the wall using painter's tape.

DSC_7164

Put a nail in each of the spots you marked on the wrapping paper.

DSC_7169

Here's a photo of all the nails in the wall.

DSC_7171

Tear the wrapping paper off the wall.

DSC_7174

Then hang your photos on the wall.  Super easy, right?

DSC_7177

Much better.

DSC_7179

Tuesday, November 27, 2012

Neverending Projects

I hope everyone had a wonderful Thanksgiving.  We took full advantage of the long weekend.  I have been horrible about remembering my camera lately, so I have no photos to show.  I am not sure what is wrong with me lately.  I think that is a big reason I have not been blogging very much.  I don't have any photos to share.
 
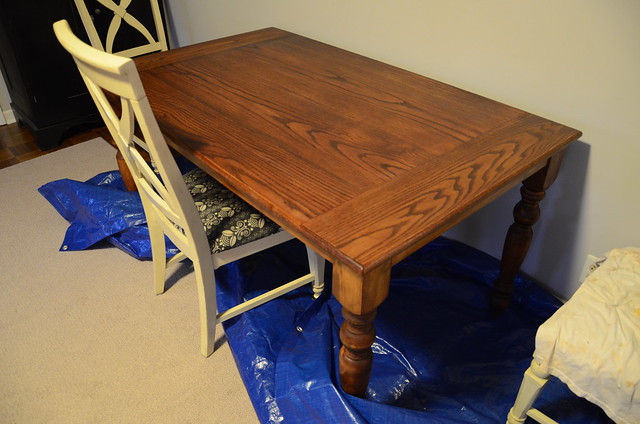
Anyway, I thought I would show you what we have been up to in regards to the house.  Mitch built us a nice dining room table last week.  He was able to reuse the legs from our old craft table so he only had to buy the wood for the top of the table.  He is still in the process of sealing it.  I think he has at least one more coat to go. 
 
DSC_6194

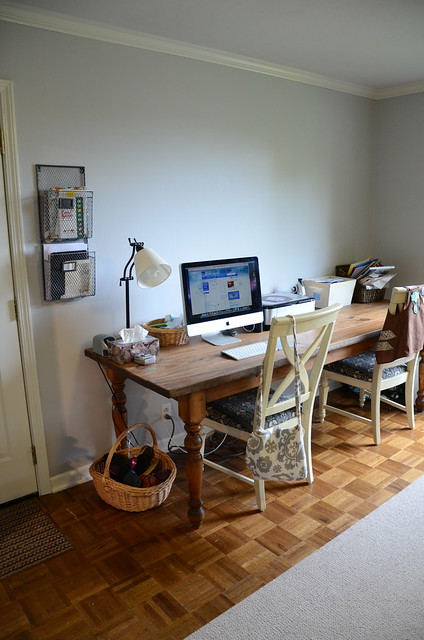
Mitch originally made the table below that we were using as a craft table and then a computer desk. Before the kids were born we had one whole room dedicated to a dining room, which is why the table was so big.  Now with our limited space it just doesn't make sense any more.   The plan is to make a built in computer area with shelves, so we decided to take this table apart and use the legs for our new table.
 
DSC_5767
 
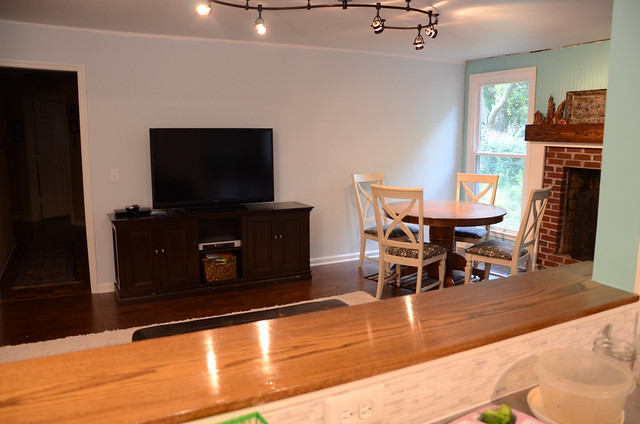
We also felt like the round table that we had did not fit the space very well. So the plan was to put the new table in the corner where the round table is in the photo below.  Now we aren't too sure.  We may make an eating area in the playroom/study. I really liked the openness after removing the round table, so I am not sure about adding a table back in there now.  Who knows what we will end up doing.  Mitch and I like to change our minds and rearrange furniture every couple of weeks. 
 
DSC_4639
 
The last time I showed you our living room it looked like this.
 
DSC_4635
 
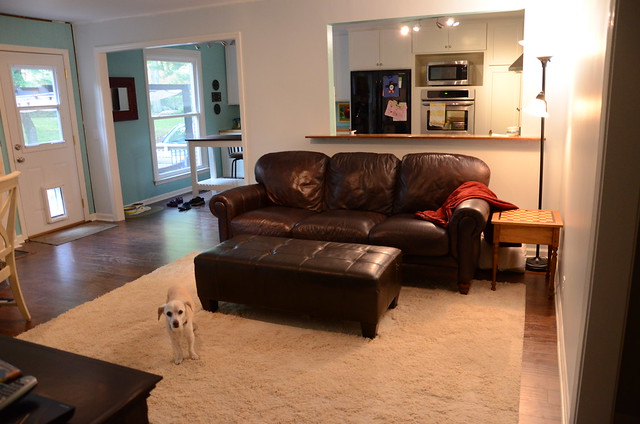
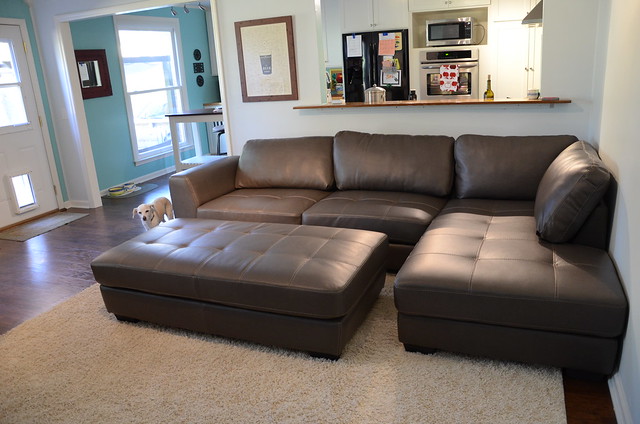
A few weeks ago we bought a new couch that fits the space a little better. We searched and searched to find a sectional to fit our strange space.  We finally settled on the one below.  It's from American Signature.  We are loving it so far.  It's nice that we can all sit on the couch comfortably and it fits the space perfectly.  It always cracks me up when I upload my photos and see Bailey photobombing my photos. 
 
DSC_6086
 
Eventhough our house is still very much a work in progress, every little project brings us closer to having the house put back together just the way we want it.   Maybe one day I will have a final reveal to show you of all the rooms finished. 
 
Since we removed the craft table from the playroom, I was actually able to find a place for the Christmas tree.  Yeah!!  I borrowed a small desk from work for the computer so we still have a place for the computer until we can figure out what we are doing in this room.
 
  DSC_6196
 
Happy Tuesday everyone!!

Tuesday, March 1, 2011

Ottoman Makeover

I know I am really stretching it these days with my Crafty Tuesday posts. I have not been in the mood to sew at all, so I am just going with it. I did manage to recover this ottoman this weekend though. It's been on my to do list for a couple of years now. I added some foam and batting and used some fabric I already had on hand. I debated on painting the wood, but decided to keep it as is for now.

ottoman
Maybe next week I will be inspired to sew something.
Crafty Tuesday everyone.

Tuesday, December 7, 2010

Bathroom Remodel Week 2

Mitch made some good progress on the bathroom over the weekend. The beadboard and trim were painted. He installed the baseboard, flooring, light and toilet. He started on the crown moulding. All that is left is installing the sink, putting up the chair rail, and finishing the crown moulding. Then we need to touch up paint. I also need to paint the doors and all the trim going down the hallway, but I am thinking that will need to wait until after Christmas.

DSC_4615
Here's a close-up of the vanity. Miller actually asked Mitch how he made the bathroom bigger. It does feel much bigger now. I am really happy with how it is turing out!!

DSC_4617
Thanks Mitch for all your hard work on the bathroom.

LinkWithin

Related Posts with Thumbnails