Pages

Thursday, October 29, 2009

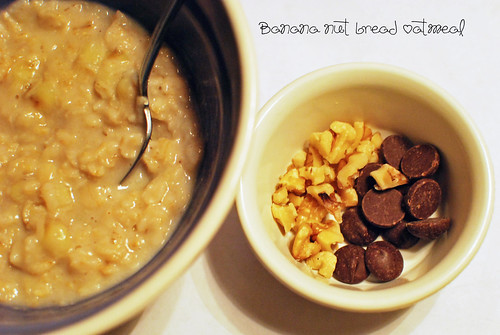
Banana Nut Bread Oatmeal

DSC_0078-edited

I have been on a major oatmeal kick lately. It has been my breakfast of choice for the last several weeks. This morning I decided to make oatmeal for me and the kids. I usually throw in frozen berries for Miller. The berries cool the oatmeal down and Miller loves blueberries. Harper just prefers brown sugar. In an effort to change things up and serve the same thing to everyone, I came up with this recipe. I served it with a side of walnuts and chocolate chips. I thought the kids would enjoy adding the goodies and mixing it all up.

Banana Nut Bread Oatmeal

1 cup Old Fashioned Oats- not the instant or minute kind (I used the Greenwise brand from Publix)

1 cup water

1 cup almond milk (any milk will work)

1 banana sliced thin

1/2 tsp cinnamon

1/2 teaspoon pure vanilla extract

chopped walnuts

chocolate chips (I used about 10)

Bring the water and milk to a boil. Add the oatmeal and reduce heat a little. Cook for about 4 minutes or until the oatmeal begins to thicken. Add the sliced banana. Mix until the banana incorporates into the oatmeal. Add the cinnamon and vanilla. Remove from heat and let sit for a few minutes. Add the walnuts and chocolate chips.

Makes 2 servings (3 if you are feeding 1 adult and 2 kids)

Tuesday, October 27, 2009

Another Round of Birthday Craftiness

My niece's birthday was last week and she turned 3. I sure do love birthdays!! It gives me an excuse to be extra crafty.

I was asked to help with the invitations for the Rock and Roll themed party. I changed the information on this one to protect the innocent.

generic rock roll invite

They handed out CDs and I helped to design the CD album cover. I sure do love photoshop too.

Josie Album Cover edited

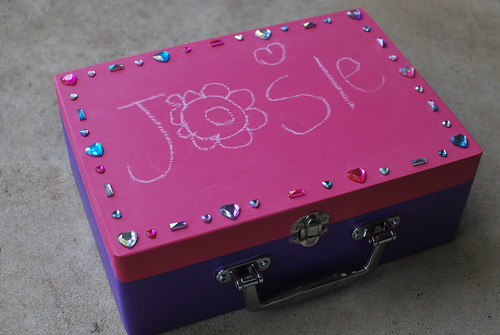
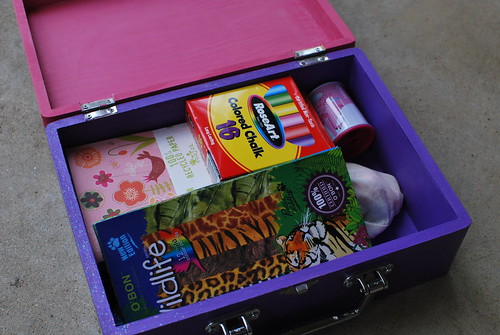
For her present I decided to make her an art box filled with eco-friendly art supplies. I bought an unfinished wooden box at Hobby Lobby. I painted the top with chalk paint and the bottom with purple. Then I used a glittery clear varnish for the top coat. Harper helped me put the gems on top and wrote Josie's name. I thought it was cute.

DSC_1747


DSC_1748


DSC_1751

I also made her a crown because every birthday girl needs a crown, right?

DSC_1752

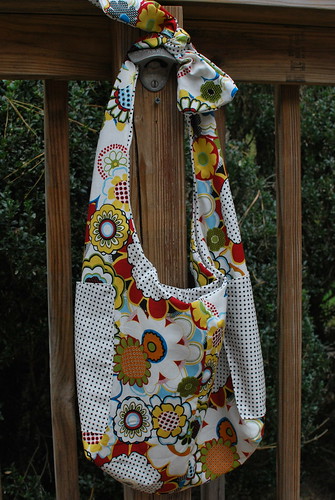
This birthday present is not for my niece. This one is for my best friend from college. Hopefully she is not reading this today because I am putting it in the mail to her today. I used the Lickety Split pattern from Made By Rae. It was really easy and came together as the name implies. I have material picked out to make myself one too.

DSC_1756

It's reversible, but I decided to put a smaller pocket inside for a cell phone, etc. instead of the larger pockets on the side. I didn't like the polka dot fabric as much and thought she probably will use the flower side more often.

DSC_0002

Happy Crafty Tuesday everyone!!

Thursday, October 22, 2009

Tutorial: Cereal Box Shipping Envelope

When I am shipping items, I reuse boxes and shipping envelopes that I have received in the mail. Every now and then I have to buy one or make one. The last time I made a shipping envelope from a cereal box I took photos so that I could share them with you.

1. Deconstruct your cereal box so that it is flat. I cut off the small end that was on the right side of the front of the cereal box, but you can also leave it attached and just tape it down.

Break down box

2. Tape down the flaps on the top and bottom of the front of the cereal box.

Tape front flap down


Tape bottom flap down

3. Cut a small slit on the top and bottom flap of the back of the box. Then cut that section out. The photo does not illustrate it well, but that whole blue section in the photo below will be cut out. This makes the outside flap. It will be the last thing you tape down to seal the envelope.

Cut end so that you will have a flap when you are done

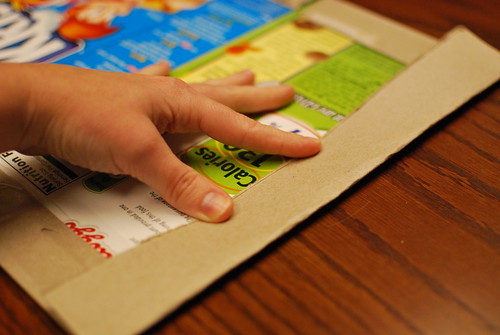
4. Tape the top and bottom flaps down like you did on the other side of the box. Also, tape down the middle flaps.

Tape down top and bottom of the back of the box

5. Fold over the flap that you just created at the end to form a crease, but do not tape this down.

Fold the flap to create a crease

7. Fold the cereal box in half.

Fold the box in half

8. Tape the sides together to form your envelope. Then stuff your goodies inside.

Tape the sides together

9. Fold over the creased edge and tape shut.

Fold flap over and tape

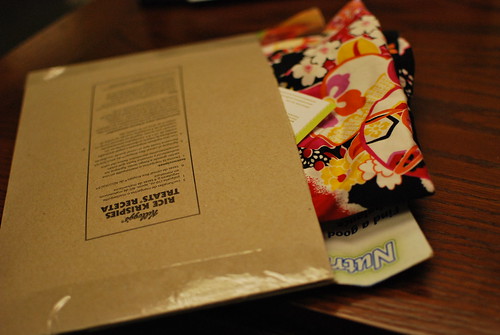
10. Viola. Now you have a nice recycled package. Attach your shipping label and put it in the mail.

Tah-dah

If you have something that you want to ship that is not flat, you can just keep the cereal box in tact. Place your items inside and tape it shut. Doesn't get easier than that.

Wednesday, October 21, 2009

Check it Out

If you get a chance, check out this site. My cozies were included among other wooly, upcycled Etsy finds.

Tuesday, October 20, 2009

All Caught Up

As I am typing this e-mail, I am all caught up on sewing. Halloween costumes are done. Wholesale orders are completed. Ahhhh, what a great feeling. Now I can concentrate on getting some stuff ready for the holidays or maybe just get in bed and finish reading my Real Simple magazine.

On Saturday we decided to go to the zoo to participate in the Halloween festivities. So in a sewing frenzy I threw together a Lightning McQueen costume for Miller. I was planning to just embellish a red t-shirt and sweat pants, but had no luck finding anything that would work. Mitch was digging around the attic trying to find things for Harper's costume when he found a big piece of red fabric that he used one year as a cape. It worked perfectly. I had a pattern for pjs. I used a size smaller and made it longer so that the outfit wouldn't be too baggy. I sewed the checkerboard fabric on the pants before I sewed them up. I also embellished the front of the shirt before I sewed it together. I really need to redo the collar it looks horrible in the back, but I am not sure I am going to worry about it.


DSC_1678


There was no sewing involved in Harper's costume. She wanted to be Elizabeth Swan from Pirates of the Caribbean. The hat, shirt, and vest where found at thrift stores. Mitch spotted the hat which is actually from a Pirates of the Caribbean costume. He is lucky like that. He put her outfit together while I was destroying the house and sewing Miller's costume. We just need to get her some boots and she will be good to go.


DSC_1680


I don't think I have ever had their costumes together this early.


Because it wouldn't feel like Tuesday if I didn't share an owl photo, here's one I finished this week.

DSC_1715

I also finished up some coffee sleeves and gadget pouches for a wholesale order.

Monday, October 19, 2009

Tips for a Green Halloween

DSC_1692

Keeping Halloween "green" is no easy task. Cheap, plastic-y costumes are for sale everywhere. There are aisles of Halloween candy for sale at the grocery store. There are school parties and trick or treating. When you are trying to be healthy and environmentally friendly, it is a bit overwhelming. I am no expert, but here are some of the things I am going to try to do this year.

1. The costume. Make your own costume. You don't have to know how to sew to do this. Get creative and use stuff you already have around the house. If your house is like my house, we have tons of dress up clothes that can be transformed into Halloween costumes. If you aren't finding what you need at home, head to a thrift store. I know this is a hard one so no judging here if you opt to buy a costume. Just try to get something that you know they will wear again for dress-up or a costume that can be passed down to a sibling or friend. Also don't forget to check with friends anf family to see if they have anything that you can use.

2. Trick or Treating. These ChicoBags are really cute, but really you can use just about anything. When I was growing up we used a pillowcase. Have your kids decorate the pillowcase using washable markers. Last year Harper decorated an oatmeal container and used that for trick or treating.

3. Candy or treats. There are an endless number of options here. Greenhalloween.org is a great resource and will give you some great ideas for food and no-food items. My rules are buy organic, fair trade chocolate or candy that has no artifical coloring and no preservatives. The fewer ingredients listed the better. You can always buy non food items, but to me this ends up being junk I have to clean up later or throw away. I bought 2 bags of candy from Yummy Earth about a month ago when it was on sale at Whole Foods.

4. Dealing with the stash. So now you are home and have all this candy, now what? Have the kids dump out their loot on the floor. Go ahead and let them indulge a little. I believe everything is ok in moderation. We usually let them pick a couple of pieces of candy that they can eat right then. The rest is put away. We don't eat candy very often at my house so this is not a big deal yet. We just recently threw out the candy from Halloween last year. Once the kids are in bed you can go through the candy and weed out the stuff you don't want them to have. Save the rest for very special occasion treats. After a couple of weeks the stash can mysteriously disappear. At least that is what is going to happen at our house.

Anyone else have any green Halloween tips to share?

Thursday, October 15, 2009

GNO- Sips n Strokes

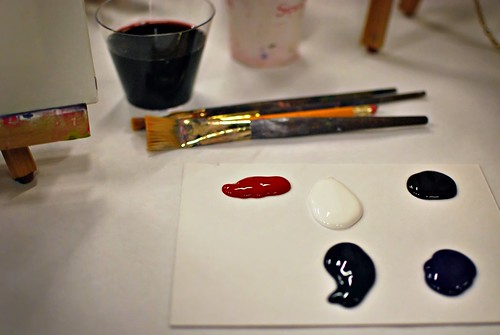
I had girl's night out last night and we went to a cool place called Sips n Strokes. You bring in your beverage of choice and the instructor walks you through painting a picture. It was a nice, relaxing, and much needed night out.


DSC_1621-edited_filtered


DSC_1624-edited_filtered


DSC_1639-edited_filtered

Last night's theme was a chair. Here's how mine turned out. The instructor added the puff paint to give it a little more dimension.

DSC_1648

Wednesday, October 14, 2009

Another Sleeping Babe

DSC_1615-edited_filtered

Mitch and I usually tag team bedtime. We each take a kid and alternate every night to keep it fair. We read them several books and then it is lights out. Last night Mitch was working so I had both kids. Usually Harper waits patiently for me to finish with Miller and then I read to her. Last night this is how I found her when I went into her room. Of course, I ran and got my camera so I could get a photo. I was only able to get a couple because I didn't want to wake her. I covered her up with a blanket and turned off her light and she did not move a muscle. I am thinking my kids need an earlier bedtime.

Do you see the photo that is in front of her? That's a picture I took last fall of her with Great Grandpa. She loves this picture and recently found it tucked away somewhere. She has been sleeping with it the last several nights. It is very sweet and I am so glad she cherishes this photo. I know it will help keep her memories of him fresh.

Tuesday, October 13, 2009

Crafty Tuesday

Good Crafty Tuesday to you.

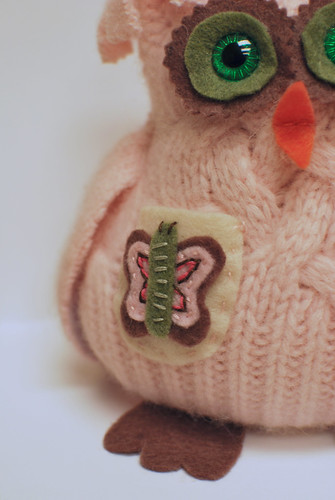
I made an owl for a custom order this week and even remembered to take her picture. Isn't she cute? If I do say so myself.


DSC_1522-edited

Harper aptly named her Ms. Butterfly.

DSC_1525-edited

I also put up another kit in my Etsy store. This one is called Nature Lover's.

DSC_1605-edited_filtered

I have also been working on a custom order for a coffee shop in Utah. She wanted her whole logo printed so I am trying out a new technique. I printed the logo on printable fabric and then embroidered over it. Now I am dreaming of all the things I could do with this printable fabric. It is really cool.

DSC_1611

Happy Crafty Tuesday everyone.

Monday, October 12, 2009

Walk for the Cure

DSC_1600

My mom was diagnosed with breast cancer back in June. She had the lump removed. Although the cancer and effected lymph nodes were removed she was still at risk for it coming back. So she has been undergoing chemotherapy. After she finishes the chemo, she will have several weeks of radiation. She has been so positive and strong during this whole process. I am so proud of you, Mom. On Saturday we walked to celebrate her.
DSC_1601
My little diva in her element.

DSC_1540

She looks like she knows what she is doing, huh?

DSC_1598

Oh my.....the eyes, the chocolate doughnut crumbs, the tiny pink feather in his hair, it's all too much for me.

DSC_1577

He is funny too.

DSC_1576

Little Miss B dressed all in pink for the occasion.

DSC_1583

Oh.... another doughnut crumb. Those messy faces and perfect eyes get me every time.

DSC_1573

Harper and Miller's cousins. I love that they are friends. I know I say this all the time, but I am truly grateful to be close to our families. It is such a blessing.

DSC_1596

Wings to represent Alice's Angels, which was our team name.

DSC_1597

Although this photo is blurry, I still love it. These two were moving so fast not one of the shots I took turned out. They are going to be trouble together.

DSC_1558

What a perfect way to spend the day.

I love you Mom.

Friday, October 9, 2009

Butternut Squash Muffins

Winter squash season has begun so I have been trying to come up with new recipes to use up all the squash we have been getting from our CSA. I made butternut squash muffins last night based on a recipe from allrecipes. Of course I had to tweak it to make it a bit healthier. Here's my version.

INGREDIENTS
1 cup pureed butternut squash (I roasted a butternut squash earlier in the week when I was cooking something else in the oven. I cut it in half and placed it cut side down on a cookie sheet and baked in a 350 degree oven for about an hour. I let it cool. Then I pureed it in my food processor.)
1 1/4 cup organic pastry flour (This is a whole grain flour that is softer and fluffier than whole wheat. I always use it when I am baking.)
1/4 cup wheat gern
2 teaspoons baking powder
1/2 cup sucanat (you an read more about this sweetner here.)
1/4 teaspoon salt
2 teaspoons pumpkin pie spice
3/4 cup almond milk
1 egg, beaten
1 tablespoon butter, melted
1/4 cup chocolate chips (optional)


DIRECTIONS
Preheat oven to 350 degrees. Lightly grease a 12 cup muffin pan.

In a large bowl, whisk together flour, baking powder, sucanat, salt and pumpkin pie spice.
In a medium bowl, thoroughly mix together milk, egg and butter. Stir in squash. Fold the squash mixture into the flour mixture just until moistened. Add chocolate chips if you are using.
Spoon the batter into the prepared muffin pan, filling cups about 3/4 full. Bake 25 minutes in the preheated oven, or until a toothpick inserted in the center of a muffin comes out clean. Remove from muffin pan and cool on a wire rack.

The muffins were very moist. The kids gobbled them up so I am calling it a success.

Thursday, October 8, 2009

Sweet Precious Sleep

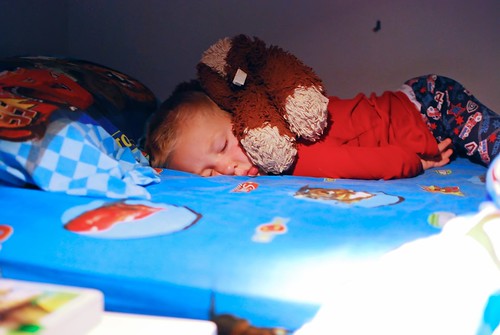
The weather has cooled off here and so it has been cooler in the house at night. I think this has helped the kids sleep better at night. I have been having to wake them up every morning. It is one of my least favorite things to do. Sleep is so precious and I hate interrupting it. However, some mornings it just has to be done. Miller was so sound asleep this morning that I pulled all the covers off of him, turned on his lamp beside his bed, and he did not move a muscle. So I did what any normal mom would do. I went and grabbed my camera.

DSC_1515-edited_filtered

Look at his smooshed up lips.

DSC_1519-edited_filtered

Big dog assumes his position over Miller's head. This is where Big Dog always sleeps.

DSC_1517-edited_filtered

I could hear his little breaths and he was so warm from being snuggled up in bed. Aren't they just precious when they are asleep?

LinkWithin

Related Posts with Thumbnails